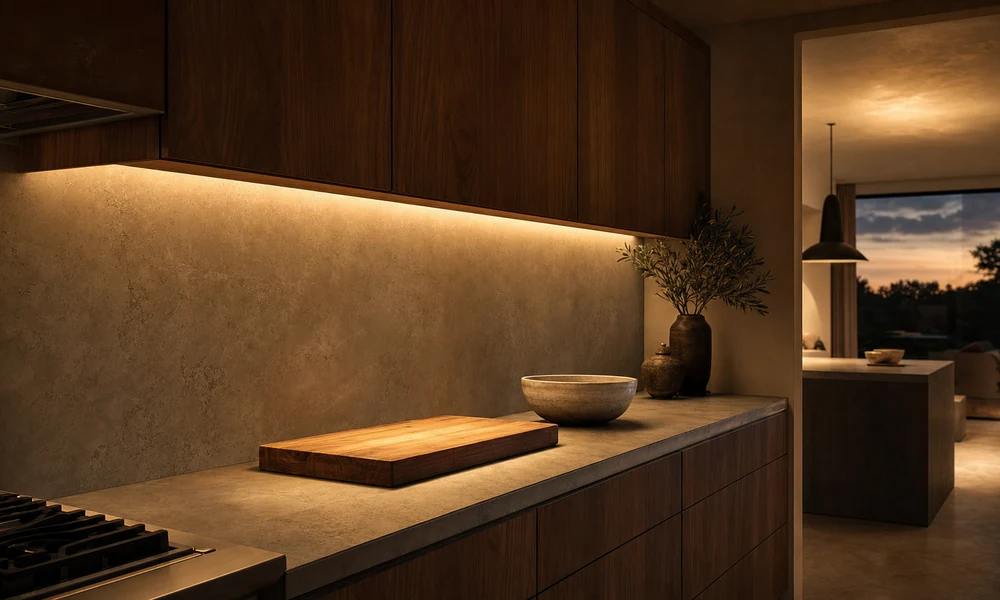
You know the board. The ceiling can is doing its best, you lean in with a knife, and the cutting board goes dark. That is not the stone. That is you, standing between the only lamp and the work. Under cabinet lighting puts the source in front of your shoulders, on the counter, where chopping actually happens.
This is still layered lighting. The strip under the wall cabinets is the task layer on the perimeter. Island pendants, if you have them, do the middle. The ceiling can wash the volume. It should not be the only thing you cook under.
What under cabinet lighting should do
Under cabinet lighting should light the counter you work on, not the backsplash you photograph. Mount a diffused LED strip toward the front lip of the upper cabinets, an inch or two back so you do not see the diodes. Keep the same Kelvin as the rest of the kitchen. Put it on a dimmer.
A U.S. Department of Energy note on residential undercabinet LEDs is blunt about the job: first the work surface, then some light on the backsplash so the wall is not a cave next to a bright board. A related DOE residential guide that reprints IES handbook values puts prep around 50 footcandles, versus about 5 to walk the room. You do not need a meter. You need to see the knife.
Where should the strip go?
Toward the front. Not against the tile.
Install guides that ship with LED tape say the same thing in plainer English. For maximum light on the work, mount the tape toward the front of the cabinet with the LEDs facing down. An inch or two back from the lip still hits the board and lets a little light graze the backsplash. Park the strip at the back wall and you get a glowing tile and a shadowed cutting board — the usual regret.
If the cabinet has a face frame or a light rail, tuck the channel behind that trim. The rail is a shade. It hides the fixture from the stools and from the living room. Bare diodes in the front third, with no lip, will glare at anyone sitting down.
Glossy quartz, polished granite, glass tile: the counter can turn into a mirror. Then the same install sheets tell you to flip the geometry. Mount on the inside of the front lip, diodes aimed at the backsplash, so you are not staring at a row of stars in the stone. The wide beam still reaches the work. Test it with painter’s tape before you peel the backing. Night, not noon.
Do not power a coiled reel. It will cook itself. Do not stare into the tape.
Strip, bar, or puck lights?
A continuous strip or a linear bar in a frosted channel is the default for a long prep run. It washes. Puck lights make pools. Pools look like a cocktail bar and leave dark bands between the circles. That is fine inside a glass cabinet or on an open shelf. It is a poor chopping light.
If you already own pucks, space them close enough that the cones overlap on the board, not so far that you see scallops. Guides do not agree on the inch count. Tape them up. Cook. If you can name the dark spots, they are too far apart.
Use a diffuser. Individual diodes on glossy stone read as a dotted line, which is how an expensive kitchen looks unfinished. An aluminum channel keeps the tape straight, hides the dots, and gives the underside of the cabinet a built-in line instead of a sticky ribbon.
A peninsula or island with nothing overhead cannot hide a strip. That surface still wants kitchen island lighting — pendants or a linear bar over the stone. Under-cabinet does the wall counters. One fixture, every job, is how you end up with a pretty island and a dark galley.
Plug-in, hardwired, or battery?
If there is an outlet inside an upper cabinet, a plug-in tape kit is the least drama. Run the low-voltage lead through a small hole at the back corner, park the driver in the cabinet, hide the cord. It will not look as clean as a wall switch. It will light the board this weekend.
Hardwired bars belong on a remodel, or whenever you want the same switch as the rest of the kitchen. That is electrician work. Do not invent a box.
Battery and rechargeable bars are how we light a small apartment without touching the wiring. On a counter you use every night they become a chore. Cells die, the board goes dark, you stop charging them. Use them as a trial of placement, or in a rental you will leave. Do not build a cooking habit on a USB cable.
Keep the driver accessible and out of the heat over the range. If a run turns a corner, continue it with a proper connector. A dark gap at the L is the tell that someone stopped and hoped.
Kelvin, CRI, and the dimmer
Pick one color temperature for the whole kitchen and keep the tape in it. ENERGY STAR builder guidance lists kitchens at 2700K, 3000K, or 3500K, with 2700K to 3000K preferred in homes. Open-plan rooms that share a view with the sofa usually want the warmer end so dinner does not go clinical. A closed work kitchen can take 3500K. Mixing 2700K cans with 4000K tape in the same glance is how the room looks like two apartments.
That choice is the same warm white vs cool white problem as the rest of the house. The K is the mood. Get it wrong under the cabinets and the perimeter fights every lamp you already own.
CRI is the quieter number, and food cares. ENERGY STAR points to 80 or better for homes and the 90s where color matters; their kitchen row is 90. A warm bulb with a low CRI still turns tomatoes gray. It just does it in amber.
Skip a single lumen-per-foot package. Retailers do not agree, and a bright strip aimed at the tile still fails. Light on the board, no diode in your eyes from a stool, a dimmer so chopping and late tea are not the same scene — that is the test. If the LEDs flicker as they dim, the dimmer and the driver are mismatched. Check the list before you blame the tape.
The usual mistakes
Mounting at the backsplash. Choosing pucks for a ten-foot run. Mixing Kelvin. Skipping the diffuser on glossy stone. Asking island pendants to light counters they cannot see. All of those are the same error: the pretty glow, not the work.
Tape the channel tonight. Stand at the board. Where is it still dark — under your hands, or nowhere in particular? That is the whole brief.