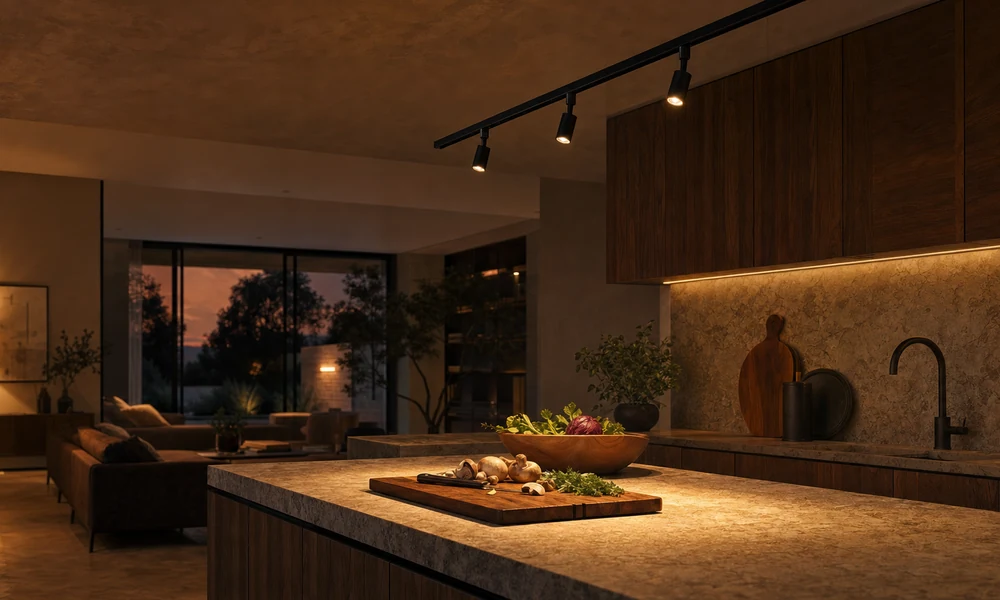
You know the leftover box. Someone swapped the builder dome for a three-head bar, dead center, and at six o’clock the cutting board is still a cave. The heads all point down like shy cans. That is track lighting asked to be a chandelier. Run the rail where you stand. Then aim.
This is still layered lighting. Track is the layer you can move — task on a bench, a little punch on a shelf, fill along a hall. It is not every layer. The ceiling can still wash. A lamp can still sit at eye height.
What track lighting should do
Track lighting should put adjustable heads on the surfaces you actually use, from one electrical feed. Plan the tasks first. Hang the rail parallel to the work, slightly in front of where you stand. Space heads about 2 to 3 feet for even coverage, tighter for a picture or a sink. Aim; do not leave them at nadir.
A short kit centered on the room will light the floor you walk on and miss the board. Pretty black rail, same failure as the big light it replaced.
Where does the rail go?
Sketch the room. Mark doors, the window, the counter, the sofa, the art. Then draw the rail on top of the jobs, not on top of the leftover box. You can feed from that box. You do not have to center the run on it.
Kitchen bench. Parallel to the counter, sitting a little in front of your shoulders so the beam hits the board. Too far toward the wall and you are back in self-shadow — the same problem under-cabinet strips exist to fix. Trade how-tos land around 2 to 2½ feet off the worktop line. Stand at the sink with a flashlight before anyone drills.
Island. A linear run along the stone can stand in for pendants when you want aim, not jewelry. Angle the heads slightly inward. Height and shade spacing for actual pendants is a different brief — that is kitchen island lighting.
Hall. Straight down the length. Overlap the beams so you do not get coins of light and dark stripes. If one center run is doing the whole path, alternate heads left and right.
A wall of shelves or art. Park the track about 2 to 3 feet off the wall on an 8- or 9-foot ceiling so the strike is a wash, not a hot scallop under the rail. Aim 30 to 45 degrees from vertical. That is the same 30-degree idea picture lights use. The rail is just how you get several of them without a box per frame.
Low ceilings like compact heads that sit close to the plaster. A deep cylinder in a 7½-foot room is a forehead problem. High ceilings want a narrower beam so the light still arrives.
How far apart should the heads be?
Guides cluster. They do not agree on a sacred inch. Start here, then look at the beam:
- About 2 to 3 feet (60 to 90 cm) between heads for kitchen and even coverage.
- Closer, toward 1½ feet, when you are pooling light on art or a short stretch of counter.
- Wider when the heads are floods doing fill, not spots doing a task.
- Support the rail itself about every 4 feet so the bar does not sag between joists.
Beam angle matters more than a kit’s default three spots. Narrow spots on a long counter make a dotted line. Wide floods on a low ceiling make hot coins. Aim kitchen heads at the work from in front of you, not straight down onto glossy stone.
Leave a spare slot. Furniture moves. So does the art.
H, J, and L are not a finish
North American line-voltage track comes in three connector standards, named for early makers. They are not interchangeable. Finish does not tell you the letter.
- H-type (Halo): usually three contacts inside the rail. Widest head selection. Common on new houses.
- J-type (Juno): two contacts, about 1 inch apart.
- L-type (Lightolier): two contacts, about ⅞ inch apart, different channel. Still hiding in older ceilings.
Count the contacts with the power off. Photograph the end of the rail if you are buying a head at the store. H, J, and L heads are not interchangeable. Force the wrong adapter and you bend metal or you get a dead lamp. There is no safe universal converter.
Most residential runs are one circuit: one switch, all heads. If you want the art on a dimmer and the counter on another, that is a second run or a two-circuit track — a different product, not a hope.
Plug-in, dimmer, Kelvin
Replacing the existing ceiling fixture is the usual hardwired path: canopy on the old box, extra supports along the run. New circuits are electrician work.
Plug-in track exists for rentals and for anyone who is not opening a ceiling. Mount the rail, cord to an outlet. Same honesty as a plug-in scheme with no rewiring. Hide the cord if you can. Do not pretend it is plastered in.
Match color temperature across every head you see at once. ENERGY STAR builder guidance prefers 2700K to 3000K in homes. A closed work kitchen can take 3500K. A 4000K track sharing a view with a 2700K lamp is how the room looks like two different apartments. CRI 80 or better; 90 if food or paint color is the point.
Put it on a dimmer. Chopping and late tea are not the same scene. If the LEDs flicker, the dimmer and the heads are mismatched. Check the list.
The usual mistakes
Centering a 3-foot kit on the room and calling it a kitchen plan. Pointing every head at the floor. Mixing H heads onto a J rail because they were on sale and black. Buying two spots for a 10-foot counter. Ignoring ceiling height so a wide flood sits in your eyes at the table.
Mark the tasks with painter’s tape tonight. Stand at the board. Where is it still dark — under your hands, or nowhere in particular? Hang the rail there.